 Alisha Zulfiqar
Wondering how to delete a Facebook Pixel from your Shopify store without any hassle? Managing tracking codes and data tools can be tricky, but removing your Meta Pixel doesn’t have to be. This quick guide shows you simple, safe steps to delete it without breaking your store or losing data.
Quick Summary
To Delete a Facebook Pixel from Shopify, identify how it was added, through the Facebook & Instagram channel, theme code, or an app, and delete it from the right place. Back up your theme, verify removal with Meta Pixel Helper, and update your privacy policy. The process takes about 10–15 minutes and keeps your store clean and compliant.
How to Delete a Facebook Pixel And Why It Might Be Necessary
Knowing how to delete a Facebook Pixel is important, especially if you’re changing marketing tools, updating your tracking setup, or improving data privacy. Here’s why removing it might be the right move for your business.
The Power (and Pitfalls) of the Meta Pixel
The Meta Pixel (formerly Facebook Pixel) tracks visitor behavior, measures ad performance, and enables retargeting, making it essential for Shopify stores running Facebook or Instagram campaigns. However, it also raises privacy concerns under GDPR and CCPA, can create redundant data with multiple trackers, and some merchants remove it when shifting away from Facebook marketing.
Common Reasons You Might Need
You might be removing your Facebook Pixel because you’ve switched to Google Tag Manager, have duplicate pixels affecting data, or no longer use Facebook Commerce. Privacy and compliance updates under GDPR or CCPA are also common reasons. Whatever the case, deleting it correctly prevents leftover tracking or broken integrations.
Understanding How Your Meta Pixel Connects to Shopify
![]()
Before deleting your pixel, it’s important to understand how your Meta Pixel connects to Shopify and tracks customer actions across your store.
The Official Shopify Sales Channel Integration
Most Shopify stores add the Meta Pixel via the official Facebook & Instagram sales channel, which automatically connects your store to Facebook Business Manager. This seamless method adds the pixel code without requiring any manual theme edits.
Manual Code Installation in Your Shopify Theme
Some store owners prefer manually adding the Meta Pixel Code to their theme’s Liquid files. This approach offers more control, especially if you’re comfortable editing code or working with developers. The tracking code is in your theme’s liquid file or a custom snippet.
Third-Party Shopify Apps or External Integrations
Apps like the Kit app, live chat tools, or conversion-focused plugins sometimes include built-in Facebook Pixel tracking. If you installed your pixel this way, you must manage it through the app’s settings rather than Shopify’s native tools.
Essential Pre-Deletion Checklist: Before You Begin
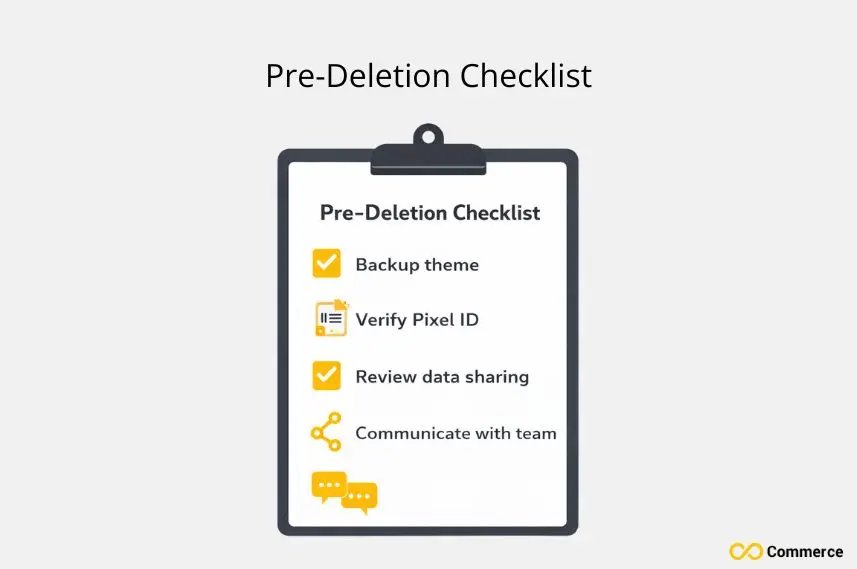
Before removing your Meta Pixel, review this essential pre-deletion checklist to ensure you don’t lose valuable data or disrupt your store’s tracking.
Back Up Your Shopify Theme (Crucial)
Before you touch any code, duplicate your current theme. Go to Online Store > Themes in your Shopify admin, click the three-dot menu next to your active theme, and select Duplicate. This creates a safety net; you can revert instantly if something breaks.
Identify Your Pixel ID (Verify which pixel you are removing)
Your Pixel ID is a unique 15-digit number. You can find it in Facebook Business Manager under Events Manager > Data Sources. Double-check this ID against the one in your Shopify settings to ensure you’re removing the correct pixel, especially if you’ve used multiple tracking codes over time.
Understand Your Current Data Sharing Settings
Review how your pixel is currently configured. Navigate to Settings > Apps and sales channels > Facebook & Instagram in your Shopify admin, then check the Data sharing section. Knowing whether you’re using standard event data or the Conversion API will help you clean up properly.
Communicate with Your Team (If applicable)
If you work with a marketing team, developer, or agency, let them know before you make changes. Removing the pixel affects Facebook Ads Manager reporting, retargeting campaigns, and analytics dashboards. A quick heads-up prevents confusion and ensures everyone’s on the same page.
Deleting a Facebook Pixel from Shopify’s Facebook & Instagram Sales Channel
![]()
If you’ve added a Facebook Pixel through Shopify’s Facebook & Instagram Sales Channel, here’s a clear guide on deleting the pixel safely without affecting your store’s functionality.
Step 1: Access Your Shopify Admin
Log in to your Shopify account and head to your admin dashboard. This is your central hub for all store settings and integrations.
Step 2: Navigate to the Facebook & Instagram Sales Channel
Click Settings in the bottom left corner, then select Apps and sales channels. Find the Facebook & Instagram app in the list and click it to open the settings panel.
Step 3: Manage Your Data Sharing Preferences
Inside the Facebook & Instagram settings, look for the Data Sharing Settings or Manage Facebook and Instagram data sharing preferences link. This section controls how customer data flows between your Shopify Store and Facebook. You can toggle off Customer data-sharing or adjust Share data settings to stop sending new event data immediately.
Step 4: Remove the Facebook & Instagram Sales Channel
To fully remove the pixel, scroll down and click Uninstall app or Disconnect. Shopify will prompt you to confirm. This action removes the sales channel, stops data sharing, and deletes the pixel from your store’s frontend. If you only want to pause tracking temporarily, consider turning off data sharing instead of completely uninstalling it.
Manually Removing Facebook Pixel from Your Shopify Theme Code
![]()
Step 1: Access Your Theme Editor in Shopify Admin
Go to Online Store > Themes in your Shopify admin. Click Actions > Edit code on your active theme. This opens the code editor, where you’ll search for the pixel code snippet.
Step 2: Locate the Pixel Code Snippet
Use the search function (Ctrl+F or Cmd+F) to find your Pixel ID. Common locations include:
- Theme. liquid (main layout file)
- head. Liquid or footer.liquid (if using snippets)
- Additional Scripts section (Settings > Checkout)
The Meta Pixel Code typically looks like this:
<!– Facebook Pixel Code –>
<script>
!function(f,b,e,v,n,t,s)
{if(f.fbq)return;n=f.fbq=function(){…};
fbq(‘init’, ‘YOUR_PIXEL_ID’);
fbq(‘track’, ‘PageView’);
</script>
Step 3: Carefully Delete the Identified Pixel Code
Select the entire script block, from <!– Facebook Pixel Code –> to </script>, and delete it. Be cautious not to remove any surrounding code or HTML. If you see Event Code snippets for specific actions (like Purchase or AddToCart), delete those too.
Step 4: Save Your Changes and Publish Your Theme
Click Save in the top right corner. If you’re editing an unpublished theme for testing, you’ll need to publish it for changes to take effect. Clear your browser cache (or open an incognito window) and visit your store to verify the pixel is gone.
Deleting Pixel from Facebook Business Manager
If you want to remove your pixel at the source, here’s how deleting the Facebook Pixel from Facebook Business Manager works and what you need to know before doing it.
Step 1: Navigate to Facebook Business Manager
Log in to your Facebook Business account at business.facebook.com. All your Connected Assets, including pixels, ad accounts, and pages, are managed here.
Step 2: Locate Your Pixels in Events Manager
Click the menu icon (nine dots) in the top left, then select Events Manager. You’ll see a list of all your pixels under Data Sources. Find the pixel you removed from Shopify by matching the Pixel ID.
Step 3: Delete the Pixel Asset Permanently
Click the pixel name to open its settings, then go to Settings > Remove Pixel. Facebook will warn you that this action is irreversible and will stop all tracking immediately. Confirm deletion. This step ensures no residual tracking occurs and cleans up your Facebook Help Center records.
How Do I Verify My Facebook Pixel Is Completely Removed?
![]()
After deleting your pixel, it’s smart to double-check your setup. Here’s how to verify that your Facebook Pixel has been completely removed from your Shopify store.
Using the Meta Pixel Helper Chrome Extension
Install the Facebook Pixel Helper Chrome extension from the Chrome Web Store. Visit your Shopify Store and click the extension icon. If it shows “No pixels found,” you’ve successfully removed it. If the pixel still appears, revisit the previous methods.
Clearing Your Browser Cache and Cookies
Sometimes old tracking codes persist in cached files. Do a hard refresh (Ctrl+Shift+R on Windows, Cmd+Shift+R on Mac) or open an incognito window to test. This ensures you’re seeing the live version of your site.
Checking Facebook Ads Manager for New Data
Wait 24–48 hours, then check your Facebook Ads Manager. The pixel is inactive if no new events (like PageView or AddToCart) are showing up. Existing data won’t disappear, but fresh event data should stop flowing.
Advanced Scenarios and Troubleshooting Common Issues
You might face a few unexpected issues even after removing your Meta Pixel. This section covers advanced scenarios and common troubleshooting tips to help you fix them quickly.
Pixel Installed via a Third-Party Shopify App
If you used an app like a WordPress Plugin equivalent, Kit app, or a live chat tool, uninstalling the app usually removes the pixel automatically. Check the app’s documentation or contact Shopify Support if you’re unsure.
Dealing with Multiple or Redundant Pixels
Some stores accidentally install duplicate Facebook Pixels, which causes inflated metrics. Use the Pixel Helper to identify all active pixels on your site, then remove extras by repeating the methods above. Check Google Tag Manager as well if you’ve integrated Facebook tracking there.
Understanding Shopify’s Web Pixel API & Server-Side Tracking
Shopify’s newer web pixel framework and the Conversion API add complexity. Removing the browser-based pixel won’t stop all data sharing if you’re using server-side tracking. Review your Customer Data settings and consult the Facebook Help Center for guidance on disabling the Conversion API.
“My Pixel Still Appears!” (Persistence Issues)
If the pixel persists after following all steps, check these spots:
- Additional Scripts in Shopify’s checkout settings
- External script injections from third-party tools
- Old code lingering in an unpublished theme
Use the code search feature in your theme editor to search for any remaining Pixel ID references.
When to Contact Shopify Support or the Facebook Help Center
Contact Shopify Support via live chat or email if you’ve exhausted all options and the pixel won’t budge. Provide your Pixel ID and describe the methods you’ve tried. For Facebook-side issues (like a pixel that won’t delete in Business Manager), contact the Facebook Help Center directly.
Post-Deletion Best Practices and Next Steps
Once your Meta Pixel is removed, following some post-deletion best practices is important to ensure your store runs smoothly and your tracking stays accurate.
Updating Your Privacy Policy
Removing the pixel changes how you collect and process Customer Data. Update your Privacy Policy to reflect that you no longer use Facebook data sharing. This keeps you compliant with GDPR, CCPA, and other regulations, and builds customer trust.
What Are the Best Alternative Tracking Solutions?
Consider platforms like Google Tag Manager for centralized tracking, or explore privacy-focused tools like Fathom Analytics or Plausible. Many Shopify merchants also use Shopify’s native analytics, which provides solid insights without third-party scripts.
Documenting Your Changes
Keep a record of what you removed and when. Note the Pixel ID, the method used, and any apps or integrations affected. This documentation is invaluable for troubleshooting or explaining changes to stakeholders.
Maintaining a Clean and Efficient Shopify Store
Keeping your Shopify store organized and running smoothly is key to success. Maintaining a clean and efficient store can improve performance and make management easier.
Recap of the Easy Deletion Process
You’ve learned three core methods: disconnecting the Facebook & Instagram sales channel, manually removing pixel code from your theme, and deleting the asset in Facebook Business Manager. Each approach is straightforward once you understand where your pixel lives.
The Benefits of a Streamlined Marketing and Tracking Setup
A clean analytics setup means faster page loads, clearer data, and better privacy compliance. You’ll spend less time deciphering overlapping metrics and more time making decisions that grow your business.
Final Thoughts
How to delete a Facebook Pixel in Shopify doesn’t have to be intimidating. By taking control of your tracking codes and data sharing, you’re setting your store up for long-term success. Whether you simplify your tech stack or pivot your marketing strategy, you have the tools to make it happen.
FAQs
Go to Settings > Apps and sales channels > Facebook & Instagram, then disconnect or remove the pixel code from your theme.
Your pixel may persist due to the Facebook app, third-party integrations, or Conversion API. Check all sources or simplify tracking with Infinite FB & TikTok Pixels.
Find the old Pixel ID in Events Manager > Data Sources > Settings, click Remove Pixel, and delete its code in Shopify to prevent duplicate tracking.
In Facebook & Instagram > Data sharing preferences, toggle Customer data sharing Off to pause tracking.
Use the Meta Pixel Helper Chrome extension or check Facebook Ads Manager, if no new events appear after 24–48 hours, your pixel is gone.
