 Amber Naz
Summary
Connecting Klaviyo to Shopify takes only a few minutes, but the setup choices you make in those minutes decide whether your emails and texts run on clean data or quietly misfire for months. Subscribers can land on the wrong list. Abandoned cart flows may not trigger. Customers in some regions may not be tracked at all.
This guide walks through the Klaviyo Shopify integration step by step: what to do before you connect, the connection itself, the sync settings that matter, onsite tracking, how to test that data is flowing, and what to do when it is not. It draws on Klaviyo’s help center, Klaviyo’s Shopify App Store listing and Infinite Commerce’s own app page. Klaviyo’s help articles and app listing change, so check the screens in your own accounts as you go. The article does not promise revenue results, since those depend on your list, your offers and your emails.
Quick answer
- Prepare: disconnect any other email platform connected to your store, and check you have the right access in both Shopify and Klaviyo.
- Install and connect: in Klaviyo go to Integrations, find Shopify, enter your store URL and approve the permissions in Shopify.
- Configure the sync: choose your email and SMS lists, Shopify Markets and whether to sync data back to Shopify.
- Turn on onsite tracking: enable the Klaviyo app embed in your theme.
- Test: place a test order and check the profile and events in Klaviyo.
- Fix and monitor: use Klaviyo’s troubleshooting checklist when something looks off.
What the integration does
According to Klaviyo’s Shopify data reference, the integration syncs 15 metrics (events) into Klaviyo:
| Group | Metrics |
| Checkout and order | Checkout Started, Placed Order, Ordered Product, Fulfilled Order, Fulfilled Partial Order, Cancelled Order, Refunded Order |
| Shipping | Confirmed Shipment, Delivered Shipment, Marked Out for Delivery |
| Onsite activity | Active on Site, Viewed Product, Viewed Collection, Submitted Search, Added to Cart |
The shipping metrics sync only when Shopify provides them, which Klaviyo says it does only for certain shipping carriers. Profile properties include email, name, city, state or region, zip code, country, phone number, locale, marketing consent for email and SMS, and Shopify tags.
These events are what power Klaviyo’s automated flows, such as welcome series, abandoned cart and post-purchase follow-ups. Klaviyo’s Shopify App Store listing describes the app as an email platform connected to your store for newsletters, abandoned cart emails, segmentation and automated product feeds, with signup pop-ups and pre-built welcome series, win-back emails and newsletters.
Is Klaviyo the right choice?
Since this is a decision as well as a setup task, consider these points before you connect.
- What you need: if you want email and SMS marketing driven by what shoppers browse and buy, Klaviyo is built for that.
- Cost: the Shopify listing shows pricing as “Custom” on the app page, and says it is free for up to 250 subscribers or customers, $25 a month for up to 500 and $50 a month for up to 1,000, then scaling with store size, with all plans including all features, and a free 30-day trial. Klaviyo’s own pricing page did not show details when checked, so confirm current prices, including SMS credits, on Klaviyo’s site before you commit. Costs rise as your list grows.
- One store per account: Klaviyo supports one Shopify store per account, so each store needs its own Klaviyo account.
- Migration: if you are switching from another email platform, plan the move. The setup guide warns about a specific problem covered below.
None of this says Klaviyo is better than another tool for your store. It says what to check before you start.
Before you connect
- Disconnect other email platforms. Klaviyo’s setup article says that if you are migrating from another email service provider connected to your Shopify store, you should disconnect it first. Otherwise it warns of “double opt-in emails sending to your existing subscriber list.”
- Check your access. You will approve permissions in Shopify and set up lists in Klaviyo, so use accounts with the right level of access in each.
- Know your store URL. Klaviyo asks for your store URL in the format mystore.myshopify.com, which is Shopify’s own address for your store, not your custom domain.
- Decide on your lists. Klaviyo recommends your main list for email subscribers, the one that triggers your welcome series, and separate lists for email and SMS. Create or name them before you start if you can.
- Review your checkout consent wording. Klaviyo recommends customizing the Accepts marketing checkbox label in Shopify’s checkout settings, so that what shoppers agree to is clear. Make sure your wording and your regional legal requirements match.
Step 1: Install Klaviyo and connect to Shopify
Klaviyo’s getting started article gives these steps:
- In Klaviyo, go to Integrations, click Explore apps, search for Shopify and click Install.
- Enter your store URL in the format mystore.myshopify.com and click Connect to Shopify.
- In Shopify, review the permissions and click Install app. You will be redirected back to Klaviyo.
- Click Integrate to confirm.
- Configure the sync settings, then click Complete setup. A green success message confirms that data is syncing.
Read the permissions screen in Shopify before you approve it. It lists what Klaviyo can access, and you are responsible for deciding that it fits your privacy policy.
Step 2: Configure the sync settings
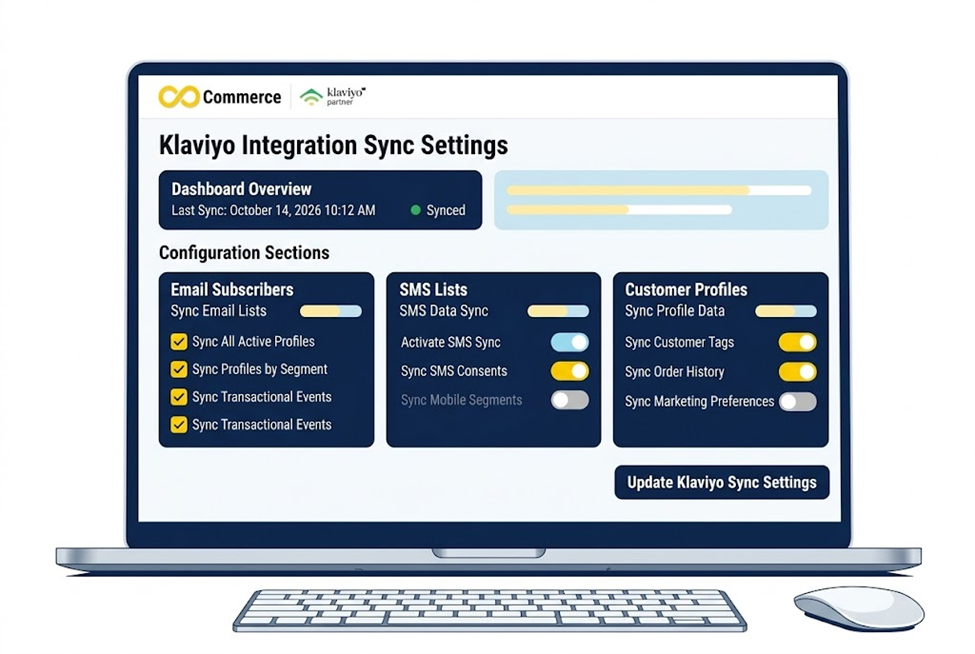
This screen is where most mistakes happen, so slow down. The settings below are described in Klaviyo’s setup article.
Email subscribers
Customers who accept email marketing at checkout, or sign up through a Shopify sign-up form, are added to a list you choose. Klaviyo recommends your main list, the one that triggers your welcome series.
SMS subscribers
Future SMS subscribers from Shopify are added to a list you choose. Klaviyo says consent syncs only when a person subscribes to SMS in Shopify for the first time, and that historical subscribers require separate steps. It recommends separate lists for email and SMS. SMS has its own consent and legal rules, so confirm what applies in your markets before you send.
Shopify Markets
A checkbox syncs your existing and future international market catalogs. Turn it on if you sell internationally through Shopify Markets.
Klaviyo to Shopify sync
You can sync profile data back to Shopify. You choose whether to sync updates for all Klaviyo profiles, which creates new Shopify customers for every profile including imported ones, or only for profiles that already exist in Shopify. You can also choose which data to sync, such as name, email, phone, subscription status, events, locale and custom properties. Klaviyo recommends syncing all profiles and all data types, but think about whether you want imported contacts appearing as Shopify customers before you tick that box.
One caution from the article: do not manually update custom profile properties in Klaviyo that come from Shopify, such as Shopify tags, because the next sync will overwrite your changes.
Click Complete setup when you are done. You can change these settings later under Integrations, then Shopify, then Update Settings.
Step 3: Turn on onsite tracking
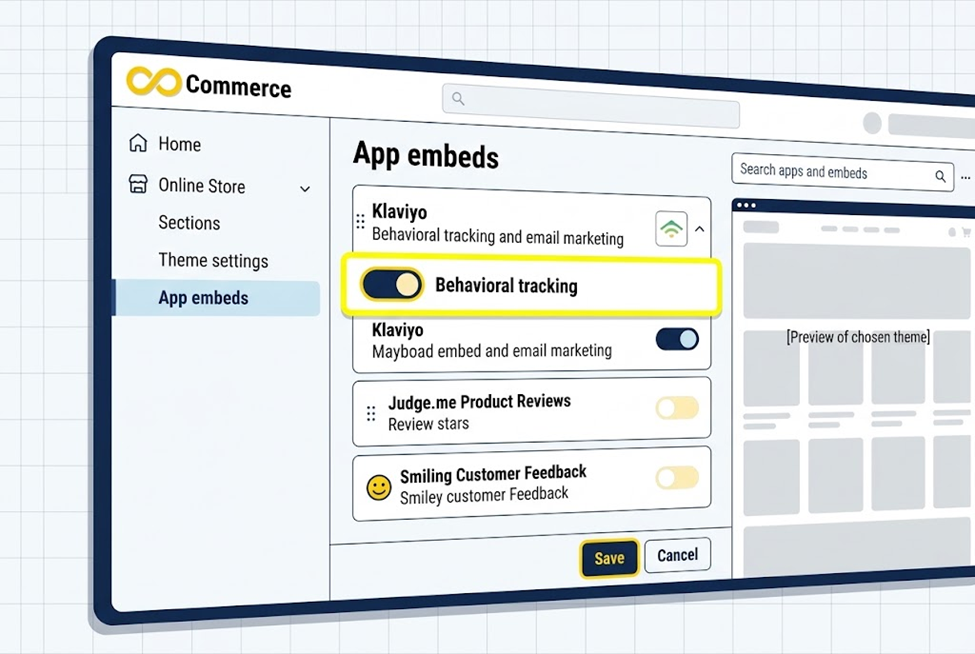
Order data syncs from Shopify itself. Browsing data needs a small piece of code on your storefront, which Klaviyo delivers through a Shopify app embed. Klaviyo’s onsite tracking article lists these steps:
- In Klaviyo, go to Integrations and click Shopify.
- In the Onsite tracking section, check Track behavioral events. This enables Viewed Collection, Submitted Search and Added to Cart. Viewed Product is enabled by default.
- Click Turn on to go to Shopify, and sign in with the account you integrated if prompted.
- In your theme’s App embeds tab, toggle the Klaviyo embed on.
- Click Save in the theme editor.
- Return to Klaviyo and refresh if needed. A green banner confirms the app embed is enabled.
A few details from Klaviyo’s documentation:
- An app embed can be linked to only one Shopify store.
- If you add a new theme, you must re-enable the app embed for that theme. This is one of the most common reasons tracking stops after a redesign.
- Enabling tracking also allows you to use Klaviyo sign-up forms on your site.
- Active on Site and Viewed Product are tracked through the app embed. The other three onsite events are tracked by a Shopify pixel.
Privacy settings that affect tracking
Two requirements affect whether your flows trigger:
- For Viewed Collection, Submitted Search and Added to Cart to attribute to profiles, Klaviyo says Shopify Network Intelligence must be enabled under Settings, then Customer privacy, in Shopify. Otherwise flows that use these events may not trigger.
- Based on your Shopify Customer Privacy settings, Klaviyo may not track onsite events for visitors in the EU, EEA, UK or Switzerland without their consent.
These are not bugs. They are consent controls, so decide deliberately whether to enable them, and test with that in mind.
Step 4: Test that data is flowing
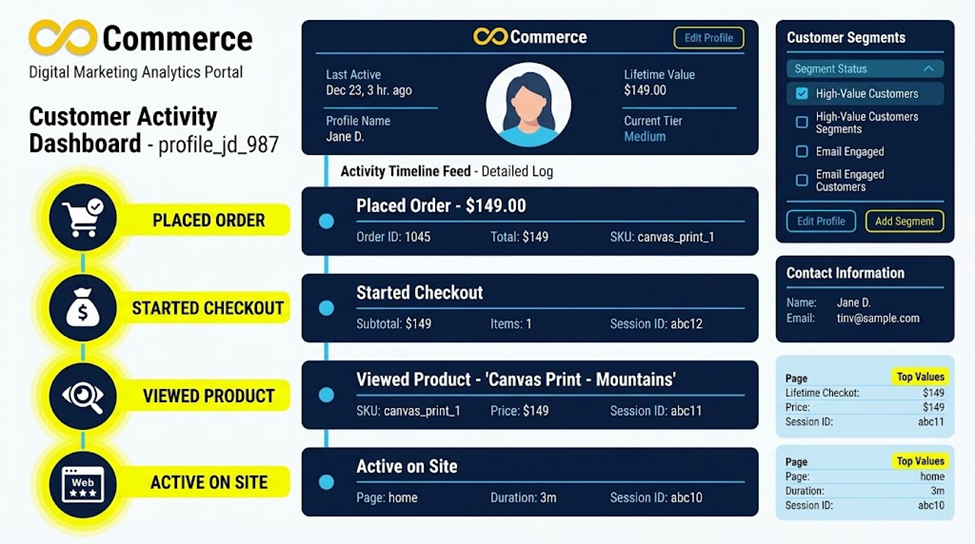
Do not assume the green banner means everything works. Test each part.
Test the initial sync
Klaviyo says it first syncs the last 90 days of Shopify data, then begins the full historical sync. The historical sync can take from a few minutes to several days depending on store size, and a progress bar shows its status. After it completes, new data syncs in real time, with events and profile data typically appearing within seconds.
Test the onsite events
Klaviyo’s verification steps are:
- Wait about 15 minutes after enabling the app embed.
- Add ?utm_email= followed by your own email address to your store’s homepage URL, reload, and view a product page.
- Search for your email in Klaviyo. A profile should exist with Active on Site and Viewed Product in its activity feed.
Added to Cart, Viewed Collection and Submitted Search apply only to identified profiles, such as those who submit a form, log in or enter their details at checkout. To test them, identify yourself first, then perform the action.
Test Started Checkout
Klaviyo says Started Checkout needs no additional setup once the integration is enabled. On Shopify, it fires after the customer fills out the email address field at checkout. To test, complete the start of a checkout with a test email, then search for that email in Klaviyo and look for a Started Checkout event on the profile’s activity feed.
Test Placed Order
Place a real order, or a Shopify test order, using a test email. Search for the email in Klaviyo. A Placed Order event should appear on the profile’s activity feed, allowing for sync delays.
Check your lists and consent
Subscribe with a test email through checkout and through a sign-up form. Confirm that each lands on the list you chose and that the consent status is right. Then check the opposite: a test customer who does not tick the marketing box should not be subscribed.
Step 5: Build your first flows
Once data is flowing, the flows can use it. Typical starting points include a welcome series for new subscribers, an abandoned cart flow, a browse abandonment flow and a post-purchase follow-up. Keep your first version simple, and before you turn a flow live, check that its trigger metric is the right one and that you have tested it with a test profile.
Troubleshooting common problems
Klaviyo’s troubleshooting article covers common issues:
- Store URL not recognized: the URL should match the mystore.myshopify.com pattern.
- Integration not syncing: go to Integrations, then Shopify, then Update Settings, and re-authenticate with Shopify. Stay on the page until the process finishes, because leaving early can disable the integration. A “Settings Updated” message confirms the resync.
- “We are unable to update your integration settings at this time”: possible causes include a misspelled store name, a frozen Shopify store (for example from an unpaid balance or an expired trial), a removed store, or the Klaviyo app not being installed in Shopify.
- Cannot add a second Shopify store: one store per Klaviyo account.
- Sync-failure notification persists after a fix: you can generally ignore it unless data is still arriving late or not at all.
- Onsite tracking stops after a new theme: re-enable the Klaviyo app embed for that theme.
For missing orders and checkouts, Klaviyo’s articles on started checkout and placed order tracking list further causes. These include an integration that is not fully set up, a third-party checkout app or extension that interferes with checkout events, flows still pointing at an old platform’s metric after a platform switch, firewall or security software blocking Klaviyo (Klaviyo recommends allowlisting the user agent “Klaviyo/1.0”), and simply a new store with no events yet.
One more limit worth knowing: Klaviyo says it does not re-sync metrics after the initial event, so tags or adjustments made to an order after the fact will not update in Klaviyo. Profiles deleted in Shopify are not deleted in Klaviyo.
A pre-launch checklist
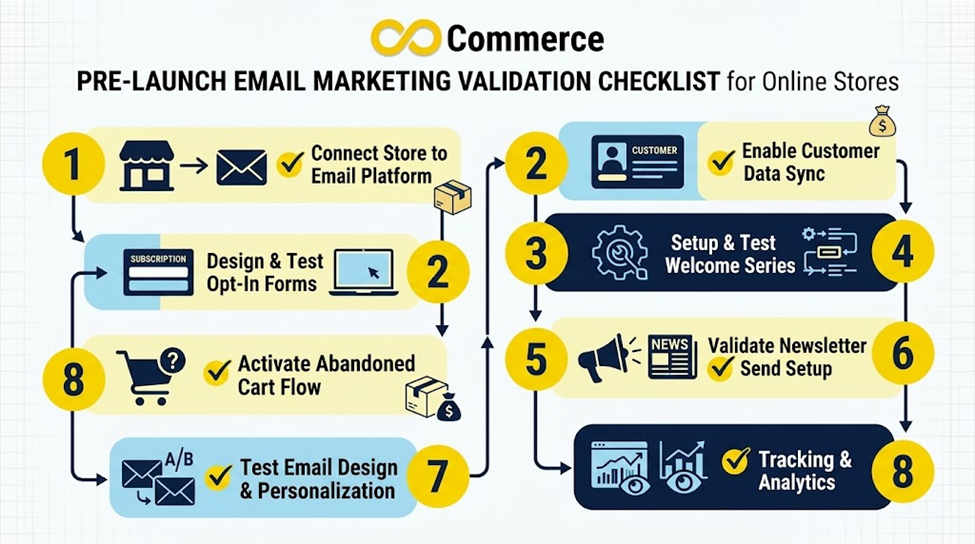
- Any previous email platform disconnected from Shopify
- Integration shows a green success message
- Email and SMS lists chosen and separate
- Accepts marketing checkbox wording reviewed
- Klaviyo app embed enabled on the live theme
- Shopify Network Intelligence setting understood and decided
- Test profile shows Active on Site, Viewed Product, Started Checkout and Placed Order
- Test subscriber lands on the right list with the right consent
- First flow triggered on a test profile before going live
Where ad tracking fits
Klaviyo handles email and SMS. It is not your ad tracking. Facebook and TikTok ads depend on pixels and conversion events that send purchases back to those platforms, which is a separate setup. Klaviyo’s listing does mention syncing Shopify customers with Facebook Custom Audiences, which is a different feature from pixel tracking. If you are setting up the pixel side as well, our guide to Meta Pixel setup and best practices for Shopify stores is a good place to start.
If you run Facebook or TikTok ads alongside Klaviyo, check that each tool sends its own data once. Infinite Commerce’s Facebook and TikTok Pixel app adds Facebook and TikTok pixels and conversion APIs (server-side tracking) to a Shopify store. According to its page, setup is three steps: install the app, add your pixel IDs and enable server-side tracking with a toggle. It lists a Free plan, Basic at $6.99 a month, Standard at $9.99 and Premium at $19.99, with a 7-day trial on paid plans. Prices are those shown on the page today, so check them before you install.
Common mistakes
- Leaving the old email platform connected. This can trigger double opt-in emails.
- Putting email and SMS subscribers on one list. Klaviyo recommends separate lists.
- Editing synced properties by hand. The next sync overwrites them.
- Forgetting the app embed after a theme change. Tracking silently stops.
- Ignoring regional consent settings. Some visitors will not be tracked, so flows may seem to under-trigger.
- Not testing. A green banner is not proof.
- Importing a big list without thinking. Check the Klaviyo to Shopify sync choice first, since it can create Shopify customers for imported profiles.
Final thoughts
The integration itself is simple. The value comes from getting four things right: a clean connection, sensible lists, working onsite tracking and a habit of testing with real test orders. Do the checks in this guide before you send your first campaign, and recheck after anything that changes your store, such as a new theme, a new checkout app or a change to your privacy settings.
Make sure your ad tracking matches your email data
If you advertise on Facebook or TikTok, make sure your pixel and conversion tracking are as carefully set up as your Klaviyo integration. Infinite Commerce’s Facebook and TikTok Pixel app adds pixels and server-side tracking without code, with a 7-day trial on its paid plans. If you want help checking your tracking setup, contact our team.
FAQs
In Klaviyo, go to Integrations, search for Shopify, click Install, enter your store URL, approve the permissions in Shopify, click Integrate, configure the sync settings and click Complete setup.
Klaviyo’s Shopify listing says the app is free for up to 250 subscribers or customers, with paid pricing that scales with store size and a free 30-day trial. Check Klaviyo’s current pricing page, including SMS costs, before you commit.
Klaviyo says it syncs the last 90 days first, then the full history, which can take from a few minutes to several days depending on store size. After that, data typically appears within seconds.
Common causes include a disabled app embed, Shopify Network Intelligence not enabled for the browsing events, visitors who have not given consent in regulated regions, and flows pointing at the wrong metric. Test with a profile you have identified yourself.
Klaviyo’s troubleshooting article says one Shopify store per account is supported, so each store needs its own Klaviyo account.
