 Alisha Zulfiqar
Wondering How to Add a Facebook Pixel to your Shopify store without paying for pricey tracking apps? You can easily set it up yourself and skip the $15–30 monthly fees. This quick guide will show you how to save money and take full control of your tracking setup.
Quick Summary
Adding Facebook Pixel to Shopify without apps Here, you will manually add the Meta Pixel base code in your theme header section by code editor. Behind it there will also be required events for standard functionality like tracking purchases and adding to cart, which can be reported by putting some dedicated code in the necessary template files. This technique gives you more control, saves you money every month, and most importantly, makes sure that your pixel data is flowing consistently to Facebook Ads Manager without app-level blockage.
Why Do You Need to Install Facebook Pixel Manually?
Installing the Facebook Pixel manually is an important step for gaining full control over how your website tracks and measures user interactions.
How to Add a Facebook Pixel
Adding a Facebook Pixel to your Shopify store is the first step toward tracking customer actions and optimizing your ads. It helps you gather valuable data, measure conversions, and improve your marketing performance effectively.
Complete Control Over Your Data
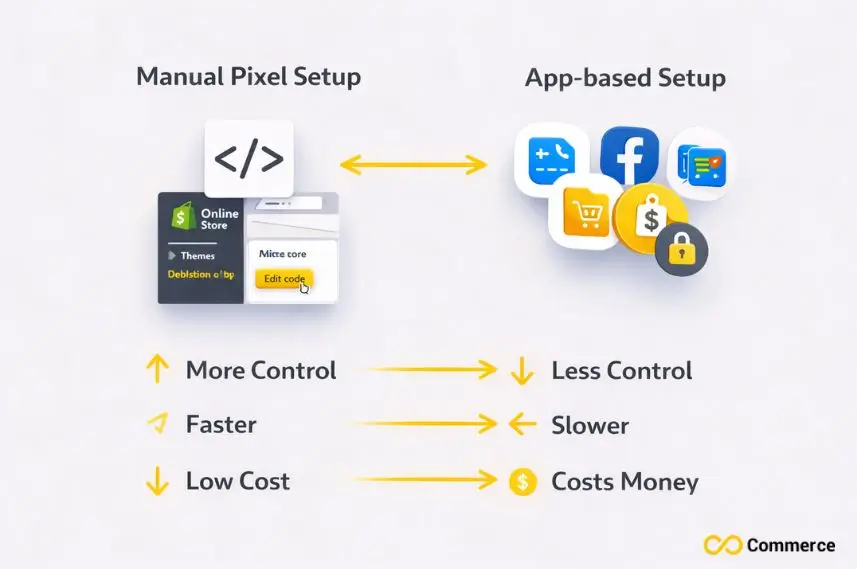
When you include the Facebook Pixel yourself on Shopify, you cut out the middleman. Third-party apps typically send your customer data to Facebook after it is processed by their servers, which can:
- Create delays in data transmission
- Potentially compromise data accuracy
- Create a convoluted way to track your opponent
- Increase monthly operational costs
Cost Savings for Your Business
I’d say its plan is competitive with most Facebook Pixel apps, which range from $5-30/month. “These are the kinds of fees that small business owners pay every month,” Wolff said. – It is a manual install and it is completely free of charge.- You can experience the same feature as the paid one.
Better Performance Post-iOS 14 Updates
Privacy changes in Apple’s iOS 14 and later iOS 15 shook Facebook advertising to its core. Manual pixel implementation along with correct Conversions API setup enables you to keep better tracking accuracy than alternative app-based solutions, as they might not be updated for these changes.
What Is a Meta Pixel, Anyway?
The Meta Pixel, formerly known as the Facebook Pixel, is a powerful analytics tool that helps you understand how visitors interact with your website after seeing your ads.
Understanding Facebook’s Tracking Tool
The Meta Pixel (formerly Facebook Pixel) is a snippet of JavaScript code that you add to your website. It’s like a digital detective that spies on what visitors do while they’re at your Shopify store, and then tells Facebook Ads Manager about it.
The pixel code fires when someone visits your online store, and then it sends the information about what they do on the site back to Facebook. This data can inform how you market to customers, generate Custom Audiences and yield more effective advertising campaigns.
How Pixel Tracking Actually Works
Pixel is served using standard events and custom events. A typical events like “Add to Cart” and “Purchase” are a default action what Facebook understand implicitly. When a person takes those actions, the pixel sends those events back to Facebook with specific pieces of data.
- Product information and pricing
- Customer demographics (when available)
- Page views, time on site
- Conversion tracking data from your Facebook ads
Benefits of using for your Shopify store
There are several benefits of setting up a Facebook Pixels for your e-commerce store:
Better Ad Targeting: Build Lookalike Audiences of your top customers. Facebook looks at the people who have purchased from your store and identifies similar users to show your ads to.
Retargeting Ability: Show your ads to visitors of specific product pages who didn’t buy. This can be particularly effective for abandoned carts at your farmstand or online.
Conversion Rate Optimization: Monitor your Facebook & Instagram ads to see which ones help drive sales and where you should allocate your advertising budget.
Dynamic Ads: Promotes the automatic display of your most relevant products to people who visited your product catalog, and can drive them directly to a purchase.
Essential Preparations Before You Begin
Before setting up the Meta Pixel, it’s important to take a few preparatory steps to ensure a smooth and accurate installation process.
Creating Your Meta Pixel ID
Before you add any code to your Shopify store, make a Meta Pixel in Facebook Business Manager or Meta Business Suite. Here’s the step-by-step process:
Get to Facebook Business Manager: Sign in to your Facebook business account.
Go to Events Manager: Click on this in the main menu under “Measure & Report”.
Create New Pixel: Click “Connect Data Sources” and select “Web.”
Name Your Pixel: Choose a good identifiable name – the page you are tracking and “Main Pixel” would work nicely.
Copy Your Pixel ID: You will need this 15-16 digit code to install it.
Accessing Your Shopify Admin Panel
From your Shopify admin, go to the theme customization section. The exact steps are:
- From your Shopify admin, click “Online Store.”
- From the drop-down, choose “Themes.”
- Find your current active theme
- Click “Actions” then “Edit Code.”
This article’s the code editor, where you will be doing all of your manual pixel manipulation.
Backing Up Your Theme Files
Before you edit your theme code, it’s a good idea to duplicate your theme. This preserves your store’s look and feel as the original while you work on a new version.
Copy Your Theme: In the Themes area, click “Actions” > “Duplicate.
Download theme files: Save a local copy by clicking on “Actions” and selecting “Download.”
Document Changes: Take notes of every file you change along the pixel installation process.
How Do I Set Up the Base Pixel Code?
Setting up the base Pixel code is the first step to start tracking user actions and gathering valuable data from your website.
Locating the Theme Code Editor
From your Shopify admin, go to Online Store > Themes. Now, click on the “Actions” button for your current theme and choose “Edit Code.” This will expose the folder structure of your theme, which is where you’re going to be mucking around.
Your theme files are listed on the code editor in an orderly format. Find the “Layout” folder, and this one contains the core template files that determine how your store is laid out.
Finding the Correct Header Section
Find, in the Layouts folder to be more precise, the “theme.liquid” file. This is a template of the master page that applies to every page in your Shopify store. In the head tags is where you’ll paste your Facebook Pixel script.
Find the line near the beginning of the file. This is usually a section where other tracking codes, meta tags, and CSS links can be found. You’ll place your pixel right before the closing tag.
How to Install the Meta Pixel Base Code
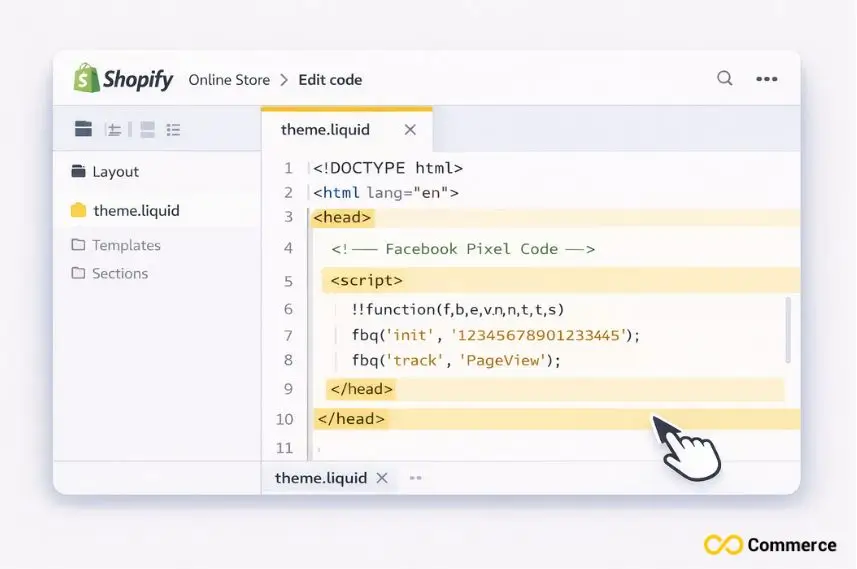
Copy the Facebook Pixel script from Events Manager, and paste it in here in your header. The code should resemble the following style:
!function(f,b,e,v,n,t,s)
{if(f.fbq)return;n=f.fbq=function(){n.callMethod?
n.callMethod.apply(n, arguments):n.queue.push(arguments)};
if(! f._fbq)f._fbq=n;n.push=n;n.loaded=! 0;n.version=’2.0′;
n.queue=[];t=b.createElement(e);t.async=! 0;
t.src=v;s=b.getElementsByTagName(e)[0];
s.parentNode. insertBefore(t,s)}(window, document,’script’,
‘https://connect.facebook.net/en_US/fbevents.js’);
fbq(‘init’, ‘YOUR_PIXEL_ID’);
fbq(‘track’, ‘PageView’);
Your_PIXEL_ID Replace YOUR_PIXEL_ID with the Actual Meta Pixel ID that you had copied from Facebook Business Manager.
Saving and Testing Your Installation
Once you’ve pasted in your pixel code, click “Save” within the code editor. You have just added your Facebook Pixel base code to all pages of your Shopify store.
To test if the installation is correct, just open the homepage of your store and launch the Facebook Pixel Helper Chrome extension. The extension should pick up your pixel and indicate that it’s firing the PageView event correctly.
How to Keep the Standard Events?
![]()
Maintaining standard events ensures that your Meta Pixel captures key user actions consistently, helping you measure conversions and optimize your ads effectively.
Understanding Standard Events Tracking
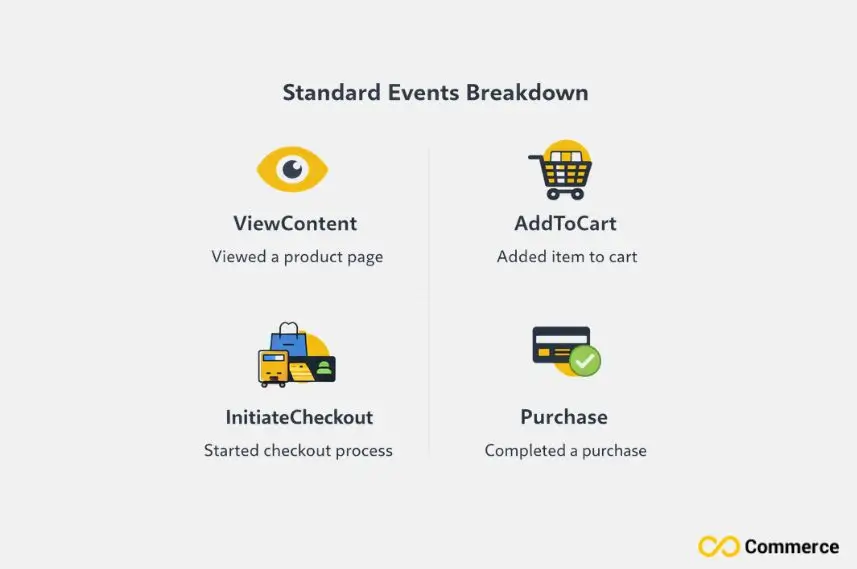
Standard events are Facebook approved, action specific, which they read and work upon for optimization. For Shopify stores the most important of these are ViewContent, AddToCart, InitiateCheckout, and Purchase events.
Each of these standard events will need to be placed in different template files. This makes sure the pixel fires at the exact time when customers take these actions.
Implementing ViewContent Events
ViewContent: Track when somebody views a certain product page. Put your product to this code. liquid template file:
fbq(‘track’, ‘ViewContent’, {
content_type: ‘product’,
content_ids: [‘{{ product.id }}’] ,
content_name: ‘{{ product.title }}’,
value: {{ product.price | money_without_currency }},
currency: ‘{{ cart.currency.iso_code }}’
});
This code collects important product details and reports them back to your Facebook ad account, which in turn improves the optimization performance of your campaigns.
Setting Up AddToCart Tracking
The AddToCart event is triggered when users add products in their cart. Add this to your product form or similar liquid template:
fbq(‘track’, ‘AddToCart’, {
content_type: ‘product’,
content_ids: [‘{{ product.id }}’] ,
value: {{ product.price | money_without_currency }},
currency: ‘{{ cart.currency.iso_code }}’
});
You probably want to call the code inside some kind of JavaScript event listener bound to the click of an add-to-cart button instead.
Tracking Purchase Events Accurately
The Purchase event is one of the most important events to track how many purchases you get and the return on ad spend. Paste this code to your checkout success page or thank you page template:
{% if checkout %}
fbq(‘track’, ‘Purchase’, {
value: {{ checkout.total_price | money_without_currency }},
currency: ‘{{ checkout.currency }}’,
{% assign n = checkout.line_items | size %} {%for line_item in checkout.line_items %}'{{ line_item.product_id }}'{% unless forloop.last %},{% endunless %}{% endfor %}] ,
content_type: ‘product’
});
{% endif %}
This retrieves the full purchase (all) and details of the purchase, such as the amount, currency volume, and the IDs of products for best-in-class tracking conversions clarity.
What About Custom Events Setup?
Setting up custom events allows you to track specific actions on your website that go beyond standard events, giving you deeper insights into user behavior.
Using Custom Events for Special Actions
With custom events you can monitor unique activities tailored to your business model. For instance, you may want to know when customers view your contact page, download a catalog, or join your newsletter.
Use a simple structure for firing a custom event:
fbq(‘trackCustom’, ‘YourEventName’, {
// Optional parameters
value: 10.00,
currency: ‘USD’
});
Put this code on the pages as needed or on various user interactions with JS event listeners.
Setting Up Custom Conversions
Once you have custom events set up, you can also make custom conversions in the Events Manager as well. Go to your Facebook Business Manager and select Events Manager, click on your pixel, then “Custom Conversions.”
Create your custom conversion by choosing the custom event and entering some rules that make sense. Now you are able to optimize your Facebook ads for these actions.
How Can You Verify Everything Works?

Verifying your Meta Pixel setup is crucial to ensure that all tracking is working correctly and that the data collected is accurate for analyzing user interactions.
Using Facebook Pixel Helper Extension
The Facebook Pixel Helper Chrome extension is also a must when you’re testing pixel installation. Now, go to different pages of your Shopify store and check: Apply the extension by completing the installation below.
Base pixel fires on all pages
ViewContent events on the product page. target=’_blank’ rel=’noopener noreferrer’> What is the issue with ViewContent on the Product Page?
AddToCart events are if an item is added
Thank you for the page purchase events!
The extension visualizes your pixel states in real time and will help you point out any errors in your setup.
Checking Events Manager Data
Keep an eye on the data stream of your pixel using Facebook Events Manager. Look for:
Live Events: Make sure that events will start being visible in a couple minutes after the test.
Event Quality Score: The higher the score, the better your data quality
Parameter Match: Ensure they are matching with the IDs and values you’ve in your Shopify data.
Settings for Customer Data Sharing: Make sure you have the best settings.
Common Troubleshooting Issues
If your pixel is not working properly, review these troubleshooting items:
Code Placement Mistakes: Make sure that the pixel code is placed within the head tags and event codes are put in appropriate template files.
Pixel ID Errors: Make sure your Meta Pixel ID is equal to what it shows you in Events Manager.
JavaScript Interference: Other scripts or apps may be blocking the pixel from firing. Open browser developer tools and look for console errors.
Ad Blocker Influence: Ad blockers on some visitors prevent pixel tracking. This is natural and all tracking techniques experience this problem.
Pro Tips for Advanced Implementation
For those looking to maximize their tracking capabilities, advanced implementation tips can help you get more precise data and optimize your Meta Pixel setup effectively.
Enabling Automatic Advanced Matching
Automatic advanced matching makes Facebook connect your pixel data with people’s profiles for better targeting and measurement of ads. Features: Activate this option in your Events Manager settings.
You can also manually implement advanced matching by passing hashed customer data with your pixel events:
fbq(‘init’, ‘YOUR_PIXEL_ID’, {
em: ‘customer_email_hash’,
fn: ‘first_name_hash’
});
Managing Data Privacy Compliance
- Make sure your pixel is GDPR, CCPA, and all other privacy law compliant:
- Implement proper consent management systems.
- Offer transparent privacy policies on data collection.
- Apply Facebook’s Limited Data Use settings when needed.
- Provide customers the option to opt out of tracking whenever they need to.
Implementing Server-Side Tracking
To get even more accurate data in a post-iOS 14 world, use Conversions API with your pixel. This is a bit more technical to set up, but there’s better data reliability, and it can bring back missing conversions lost due to browsers’ limited tracking.
Built-in customer data sharing with Shopify, which helps when completing server-side tracking without needing extra apps.
Final Thoughts
Successfully installing a Facebook Pixel without apps gives you full control over your Shopify store’s tracking and eliminates monthly app fees. Learning How to Add a Facebook Pixel manually may take a bit longer initially, but it ensures greater data accuracy and a deeper understanding of your implementation. Regularly checking with Events Manager and Pixel Helper helps confirm that your setup is working correctly.
The quality of your pixel data improves as Facebook’s algorithm collects more information from customer interactions. Be patient as your Custom Audiences and Lookalike Audiences develop, and use the conversion tracking data to refine your ad campaigns. From there, you can analyze pixel data to identify high-value customers and create scalable advertising strategies for your e-commerce business.
FAQs
To manually install, go to Online Store > Themes > Edit Code, open theme.liquid, and paste your Pixel base code before the </head> tag. This lets you track events without paying for apps.
Yes, you can install multiple Pixels for different ad accounts or campaigns. Use Infinite Facebook TikTok Pixels to easily manage and automate tracking across all Pixels.
Go to Events Manager > Connect Data Sources > Web, name your new Pixel, and copy its ID. You can then add it manually to your Shopify theme or through a trusted tracking tool.
Ensure the Pixel code is added before the </head> tag and not duplicated. Use Facebook Pixel Helper to confirm events like PageView and Purchase are firing correctly.
Manual setup works, but Infinite Facebook TikTok Pixels automates everything, from Pixel placement to Conversions API setup, ensuring precise, no-code Facebook data tracking.
