 Amber Naz
Quick Summary
A slow Shopify store costs you attention before a shopper has seen a single product. Pages that take too long to show their main image, respond late to a tap or jump around while loading feel untrustworthy, and shoppers on phones notice first. The good news is that most speed problems on Shopify come from a short list of causes you control: heavy images, too many apps, bloated theme code and third-party scripts.
This guide walks through those causes in a practical order, from measuring where you stand to fixing images, apps, themes and scripts, then checking that your changes worked. It is based on Shopify’s developer performance documentation, Shopify’s web performance dashboard introduction, web.dev’s Core Web Vitals guidance and Google’s PageSpeed Insights documentation. It does not quote load-time, speed-score or conversion statistics, because none were verified from a primary source, and it does not promise any particular score or ranking.
Quick answer
- Measure first. Use real-user (field) data to see whether you have a problem, and lab data to debug it.
- Fix the biggest image first. The main image above the fold is usually your Largest Contentful Paint element. Never lazy-load it.
- Audit your apps and scripts. Shopify says each feature you add can affect performance, and recommends removing apps, tracking pixels and theme code that do not justify their cost.
- Keep your theme code lean. Defer non-critical JavaScript, limit stylesheets and avoid layout-shifting fonts and images.
- Re-test after every change, one change at a time, so you know what helped.
What “fast” means: the three Core Web Vitals
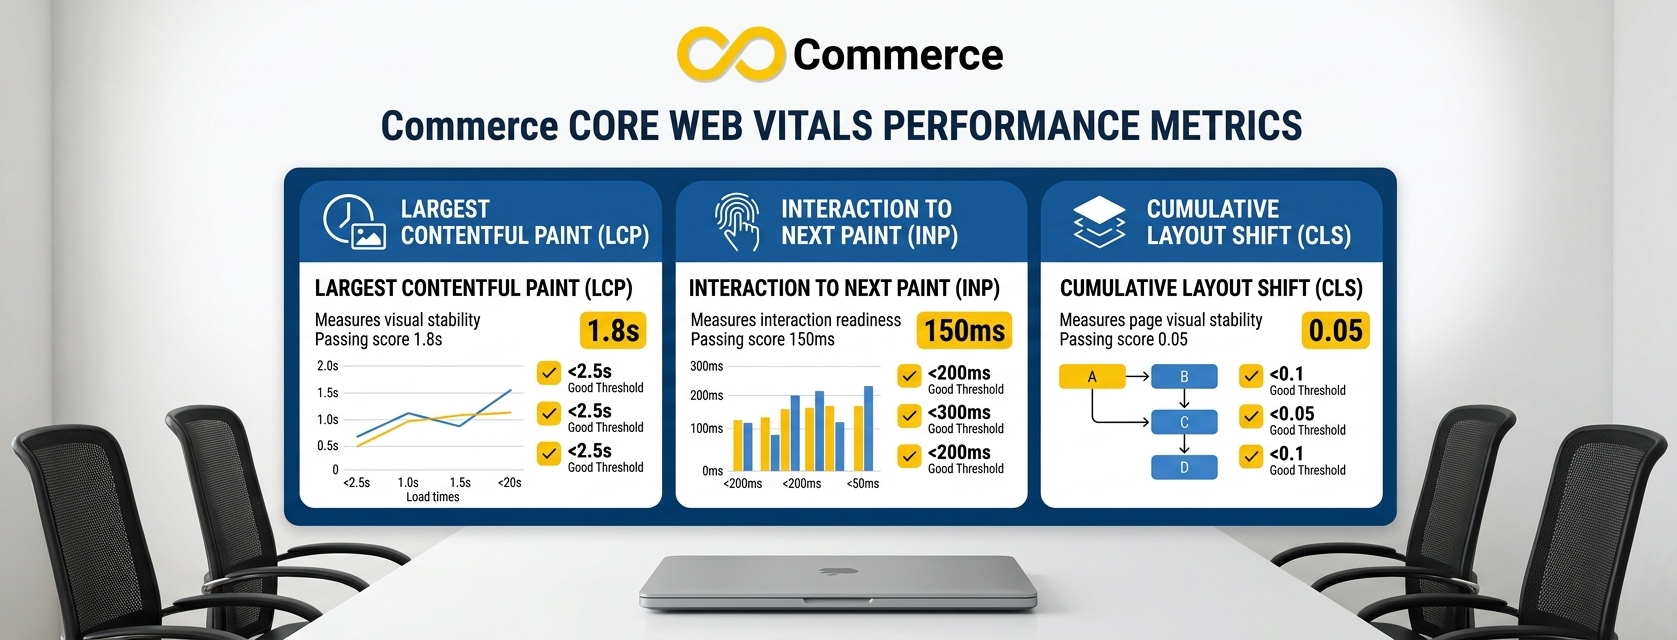
Speed is not one number. web.dev defines three Core Web Vitals, each with a “good” threshold:
| Metric | What it measures | “Good” threshold |
| Largest Contentful Paint (LCP) | How quickly the main content appears | 2.5 seconds or less |
| Interaction to Next Paint (INP) | How quickly the page responds to taps and clicks | 200 milliseconds or less |
| Cumulative Layout Shift (CLS) | How much the layout jumps while loading | 0.1 or less |
web.dev says to measure the 75th percentile of page loads, segmented by mobile and desktop, and that a page passes when it meets all three targets at that percentile. In plain terms: look at how the slower end of your real visitors experiences the page, not your own fast laptop on office Wi-Fi.
Shopify’s web performance dashboard introduction describes the same idea, saying its metric summary measures loading speed, interactivity and visual stability, and that each feature you add to your online store can impact its web performance.
Step 1: Measure before you change anything
Fixing without measuring is guessing. Start with a baseline so you can prove, later, that a change helped.
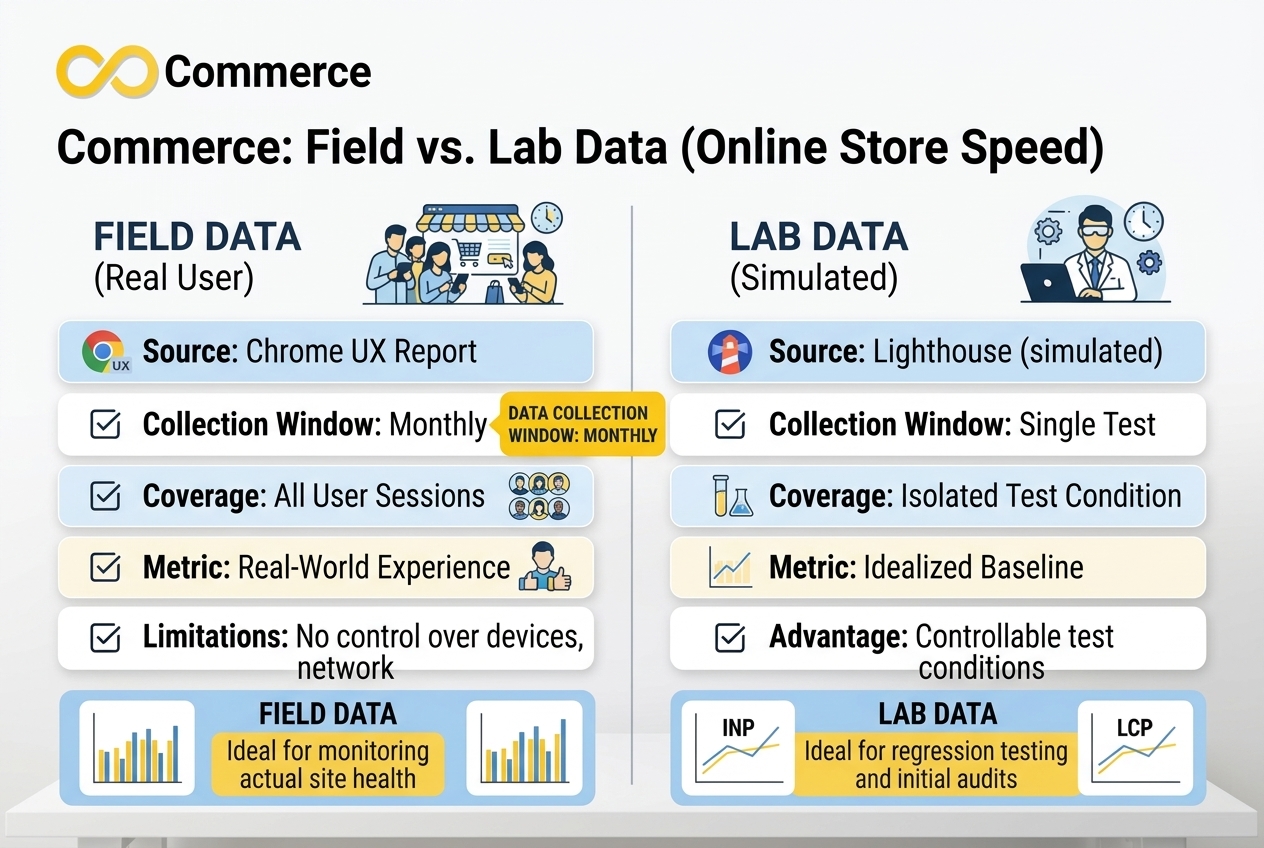
Understand field data versus lab data. Google’s PageSpeed Insights documentation explains the difference:
- Field data reflects how real users experienced a page. PageSpeed Insights sources it from the Chrome User Experience Report and uses a 28-day collection period, so it shows past performance rather than a live snapshot. If a specific page lacks enough samples, it falls back to origin-level data for the whole site.
- Lab data comes from a simulated page load run by Lighthouse in a controlled environment. Google describes it as useful for debugging, but it can miss real-world bottlenecks. Lighthouse simulates a mid-tier mobile device on a mobile network, and an emulated desktop on a wired connection.
The two can disagree, because field data aggregates many users on varied devices and networks while lab data is a single device under fixed conditions. Use field data to decide whether you have a problem and lab data to find out why.
A simple baseline routine:
- Pick five pages: your home page, a top collection page, a top product page, the cart and a content page.
- Run each through PageSpeed Insights and note the field data (if available) and the lab results for mobile.
- Write down LCP, INP and CLS for each, with the date.
- Check Shopify’s web performance dashboard in your admin, if you have access to it, for Shopify’s own view of your metrics. Menu names change, so check your own admin.
- Save the numbers in a spreadsheet. You will compare against them later.
One caution: lab scores can swing between runs. Run each test a few times and look at the pattern, not a single result.
Step 2: Understand what Shopify already does for you
Before optimizing, know what you do not need to do. Shopify’s developer documentation on platform performance says it automatically:
- Serves storefront assets from a CDN backed by Cloudflare, compressed with Brotli or gzip, using HTTP/3 and TLS 1.3.
- Minifies CSS and ES5-valid JavaScript, and caches the result until the file changes.
- Sends HTTP 103 Early Hints to preload render-blocking scripts and stylesheets.
- Streams the HTML head on eligible pages so the browser can start fetching resources earlier.
- Injects default speculation rules in supporting browsers.
That documentation’s list of what merchants and theme developers should still do includes keeping content_for_header plain and inside the head, referencing assets with asset_url and image_url, deferring non-critical resources and reducing stylesheet count. The page also says preview themes are not streamed, so test on the live theme.
The takeaway is that the platform handles delivery well, so most of your gains come from what you put on top: images, apps, theme code and scripts. The page did not state whether images are converted to formats such as WebP or AVIF automatically, so do not assume it; check your own images in a test.
Step 3: Optimize images
Shopify’s performance best practices note that images are usually the Largest Contentful Paint element, which makes them the highest-impact fix on most stores.
Protect and prioritize the main image
- Never lazy-load the LCP image. Reserve loading=”lazy” for images below the initial viewport.
- Add fetchpriority=”high” to the LCP image so the browser fetches it before other resources. Shopify’s guidance calls this a one-line change with measurable LCP gains.
- Remove fade-in or reveal animations on it. The guidance says animations delay the LCP event even after the image has downloaded.
- Use an <img> element for hero content, not a CSS background image. Background images are hidden from the browser’s preload scanner.
Size images correctly
- Use srcset and sizes with Shopify’s image_tag filter so each screen gets the smallest adequate file.
- Include width and height (the image_tag filter adds them automatically) to prevent layout shift.
- For hero images that differ on mobile and desktop, use a <picture> element instead of toggling two images with CSS, so only the matching image downloads.
Practical image habits for merchants
- Resize images before uploading. A 5,000-pixel photo that displays at 800 pixels is wasted weight.
- Compress photos sensibly and check they still look good.
- Remove unnecessary images from the first screen of key pages. Fewer images above the fold means fewer competing downloads.
- Be careful with popups: Shopify’s guidance warns that a large dialog can become the LCP element, and suggests making popups smaller than the main content or delaying them until after user interaction.
Step 4: Audit your apps
Shopify’s web performance introduction says features such as theme code, apps, images, videos, carousels, social media feeds and analytics can slow down your site. Apps are the easiest of these to add and the easiest to forget.
Run an app audit
- List every installed app in your admin.
- For each, write down what it does and whether you still use it.
- Uninstall apps you no longer need.
- Check that uninstalling actually removed the code. Some apps leave snippets in theme files. Check with your developer or the app’s documentation, and back up your theme before editing code.
- Re-run your baseline pages and compare.
Questions to ask about each app
- Does it load on every page, or only where needed?
- Does it add JavaScript above the fold?
- Does a theme feature or a built-in Shopify feature do the same job?
- Is the benefit worth the load? Shopify’s guidance says to remove apps, tracking pixels and theme code that are not justifying their performance cost.
A warning about “speed apps”
Shopify’s guidance warns against apps that cheat Lighthouse tests, such as by injecting transparent elements or serving different content to crawlers. A fake score does not help real visitors, and it can hide real problems. Judge any speed tool by your field data, not by a lab number alone.
Step 5: Choose and tune your theme
A theme is the foundation of your speed. A heavy theme with many features switched on will be slower than a lean one, regardless of how well you optimize images.
Theme habits that help
- Turn off what you do not use. Sliders, videos, social feeds and animation effects all add work.
- Reduce sections on key pages. Each section must render before content can paint, and Shopify’s documentation says to keep section Liquid efficient.
- Test before you switch. Duplicate your theme, test the new one on real pages and compare field data after launch.
- Do not judge a theme by its demo. Demo stores use ideal images and few apps.
For developers: what Shopify’s documentation recommends
- Defer non-critical scripts with defer, and use async only for independent third-party scripts where execution order does not matter.
- Load modules on demand, for example with dynamic import() inside event listeners, and build the DOM for hidden components such as drawers and filter panels only when first opened.
- Load critical CSS synchronously and use async CSS only for sections below the fold. Each extra stylesheet adds style recalculation work that can affect INP.
- Host fonts on Shopify’s CDN rather than loading them from an external service, which adds DNS and connection overhead. System fonts avoid font downloads entirely.
- Use size-adjust and descriptor overrides on fallback fonts to reduce layout shift when the web font swaps in.
- Animate with transform and opacity rather than layout properties like top or left.
- Use preload sparingly, for one or two critical resources discovered late, and preconnect only to critical third-party domains.
- Remove A/B testing anti-flicker snippets when no test is running.
If you are not a developer, hand this list to someone who is. Editing theme code without a backup can break your store.
Step 6: Control third-party scripts and tracking
Every analytics tool, ad pixel, chat widget and review plugin is another script the browser has to download and run. Shopify’s guidance says to audit regularly and remove scripts that are not earning their cost.
That includes tools like ours. Tracking and heatmap scripts have a cost, and you should weigh it honestly against what they tell you.
A sensible approach
- Make a list of every script that loads on your store. Browser developer tools or a PageSpeed Insights report can help you find them.
- Keep what you actively use. A pixel nobody checks is pure cost. Delete duplicates, such as two tools tracking the same event. If the extra script is a Facebook Pixel, our guide to deleting or resetting a Facebook Pixel in Shopify shows how to remove it cleanly.
- Load tags in one place where possible. A tag manager can centralize scripts, although it does not make them free. Check how each tag fires.
- Delay what can wait. Chat widgets and review carousels rarely need to load before the main content.
- Re-test after each removal.
Speed and tracking can work together. If you are using several tracking apps, review whether you still need all of them, and consider how they are installed. Infinite Commerce’s articles on tracking tools cover this ground, and the contact page lists tracking, pixel and feed apps among the services offered.
Step 7: See how real visitors experience slowness
Numbers tell you something is slow. They do not always tell you what a shopper did about it. Behavior analytics can fill the gap.
Microsoft Clarity’s documentation lists session recordings, which include a session list, inline player and live recordings, and heatmaps, which include click maps, scroll maps and area maps. Used on a slow page, these can show you:
- Whether visitors scroll past your hero image or leave before it appears.
- Where they tap repeatedly, which may point to something that is not responding.
- Which devices and traffic sources behave differently.
- Whether a popup or banner is in the way.
If you want this on a Shopify store without writing code, Infinite Commerce’s Microsoft Clarity & Heatmap app is a Shopify integration of Microsoft Clarity. On its app page it lists session replays, click and scroll heatmaps, filters by device, region or traffic source, and tracking of Shopify events such as View Items, Add to Cart, Begin Checkout and Purchase. As checked on 2026-10-14, the Standard plan is $9.99 per month (1,000 sessions, recordings and heatmaps) and Premium is $19.99 per month (unlimited), each with a 7-day trial. Re-check pricing before you subscribe.
A fair note: like any script, a behavior-analytics tool adds some weight, and we have not benchmarked its effect on your store. Test it as you would any other script, and use it to find and fix problems rather than leaving it installed forever without looking at the results.
Step 8: Re-test and keep a record
After each change, repeat your baseline:
- Re-run the same five pages on PageSpeed Insights.
- Compare LCP, INP and CLS against your saved numbers.
- Remember field data uses a 28-day window, so it moves slowly. Lab data shows changes sooner, field data confirms them later.
- Keep a short change log: date, what you changed, what moved.
- If a change made things worse, roll it back.
Make one change at a time. If you change the theme, remove three apps and resize all your images on the same day, you will not know which one helped.
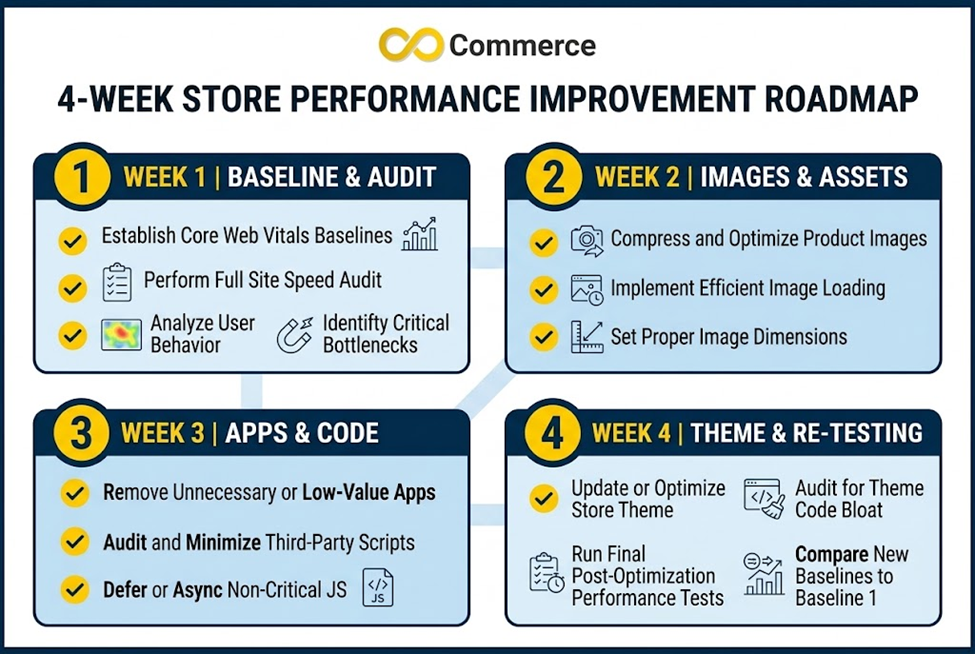
A practical 30-day plan
| Week | Focus | Actions |
| 1 | Baseline | Test five pages, record LCP, INP and CLS, list all apps and scripts |
| 2 | Images and apps | Fix the LCP image on key pages, resize oversized images, uninstall unused apps, clean leftover code |
| 3 | Theme and scripts | Switch off unused theme features, defer or remove non-essential scripts, fix layout shifts |
| 4 | Verify | Re-test, compare, log results, plan the next round |
Common mistakes
- Lazy-loading the hero image. This delays the most important element.
- Chasing a perfect lab score. Real visitors matter more than a single test.
- Installing a speed app that fakes results. Shopify’s guidance specifically warns against this.
- Leaving old app code behind after uninstalling.
- Adding preloads everywhere. Overuse competes with the browser’s own prioritization.
- Testing only on desktop. Many shoppers use phones.
- Changing many things at once and learning nothing.
- Ignoring layout shift. Images without dimensions and swapping fonts both cause it.
Final thoughts
Shopify handles delivery well, so speed work is mostly about restraint: lighter images, fewer apps, leaner theme code and only the scripts that earn their place. Measure first, change one thing at a time and judge results by real-visitor data. Then use what you learn about visitor behavior to keep improving.
Need help with your Shopify tracking and scripts?
If you want to see how visitors actually behave on your pages, explore Infinite Commerce’s Microsoft Clarity & Heatmap app, or contact our team for help with tracking, pixel and feed setup.
FAQs
Measure first with PageSpeed Insights and Shopify’s web performance dashboard. Then fix the main image, remove unused apps and scripts, tidy your theme and re-test after each change.
web.dev’s “good” thresholds are an LCP of 2.5 seconds or less, an INP of 200 milliseconds or less and a CLS of 0.1 or less, measured at the 75th percentile of page loads. Your target is to meet all three for real visitors.
They can. Shopify says features such as apps, analytics, videos and social feeds can slow a site down. The effect varies by app, so test with and without it and remove those you do not need.
No. Shopify’s guidance says to reserve loading=”lazy” for images below the first screen and never to lazy-load the LCP image.
Lab data is a simulated test on one device, while field data aggregates real users. Google’s documentation says the two can differ, so use field data to judge real experience.
Many fixes are merchant-friendly: resizing images, removing unused apps, switching off theme features and cutting scripts. Theme code changes are best left to someone experienced, with a backup first.
