 Amber Naz
Summary
Most Shopify stores do not have a traffic problem at checkout. They have a leak. A shopper has chosen a product, added it to the cart and started to pay, and then something makes them stop. Fixing that leak is usually cheaper than buying more traffic, because every shopper who reaches checkout has already shown strong intent.
This guide shows how to do checkout optimization in a practical order: first measure where shoppers leave, then fix the usual causes (too many fields, surprise costs, missing payment options, slow pages, weak trust), then recover some of the shoppers who still leave, and finally track each change so you know what worked. It draws on Shopify’s help documentation, Google’s Analytics help pages and Microsoft’s Clarity documentation. Where a claim comes from a vendor, the article says so. It does not quote conversion-rate benchmarks, because a number from someone else’s store tells you little about yours.
Quick answer
Checkout optimization is the work of removing friction between “begin checkout” and “order confirmed.” The short version:
- Measure the funnel (cart, begin checkout, shipping, payment, purchase) so you know which step loses the most shoppers.
- Watch real sessions with recordings and heatmaps to see why they leave.
- Remove effort: fewer fields, fewer decisions, saved details and accelerated checkout.
- Show the full cost early: shipping, taxes and duties before the last step.
- Offer the payment methods your customers expect.
- Recover abandoned checkouts with automatic emails.
- Change one thing at a time and track it.
What checkout optimization means on Shopify
Checkout optimization is a subset of conversion rate optimization. It covers the pages from the moment a shopper starts checkout until the order is placed. On Shopify that part of the journey is hosted by Shopify, which matters in a practical way: it is more restricted than your theme, so you tune it through settings, the checkout editor and apps rather than by rewriting pages.
According to Shopify’s help documentation, the checkout and accounts editor lets you manage the look and functionality of your checkout, thank you, order status and customer account pages. Standard customizations such as a logo, background and fonts are available on the Basic plan or higher. Advanced features, including apps on the information, shipping and payments pages and access to the Checkout Branding API, are limited to Shopify Plus. So before you plan a change, check which plan you are on and what that plan allows.
Two terms are worth separating:
- Cart abandonment: a shopper adds items but never starts checkout.
- Checkout abandonment: a shopper starts checkout, often entering an email, but does not pay.
Shopify’s own definition is specific. On its abandoned checkouts page, a checkout counts as abandoned when it stays incomplete for more than ten minutes after the customer has given their email address. This guide focuses mainly on the second kind, though some fixes help both.
Step 1: Find where shoppers leave
Do not change anything until you know where the problem is. A store losing shoppers at the shipping step needs different fixes from one losing them at payment.
Build a checkout funnel
In Google Analytics 4, a funnel exploration is the report designed for this. Google describes it as a way to visualize the steps users take to complete a task and to see how well they succeed or fail at each step. You can define up to 10 steps, each based on events or dimension values, and users who miss a step fall out of the funnel and are not counted in later steps.
A simple ecommerce funnel looks like this:
| Step | Typical event |
| Viewed a product | view_item |
| Added to cart | add_to_cart |
| Started checkout | begin_checkout |
| Added shipping info | add_shipping_info |
| Added payment info | add_payment_info |
| Purchased | purchase |
These are GA4’s standard ecommerce event names. Your funnel is only as good as the events your store sends, so confirm that each one fires once, at the right moment, with the right value. A missing add_shipping_info event looks like a leak when it is really a gap in tracking.
Once the funnel is built, use the breakdown option to split it by device, traffic source or country. A funnel that looks healthy overall can hide a mobile checkout that is failing, or one ad campaign that sends shoppers who never convert.
Compare, then investigate
Look for the largest drop between two adjacent steps. Shoppers who start checkout but never add shipping info point to the form or a surprise on the page. Those who add shipping but not payment point to shipping costs. Those who add payment but do not buy point to declined cards or a missing or broken payment method. Each leads to a section below. Also browse your abandoned checkout list in the admin for repeat products or countries; Shopify deletes abandoned checkouts after three months.
Step 2: Watch real behavior
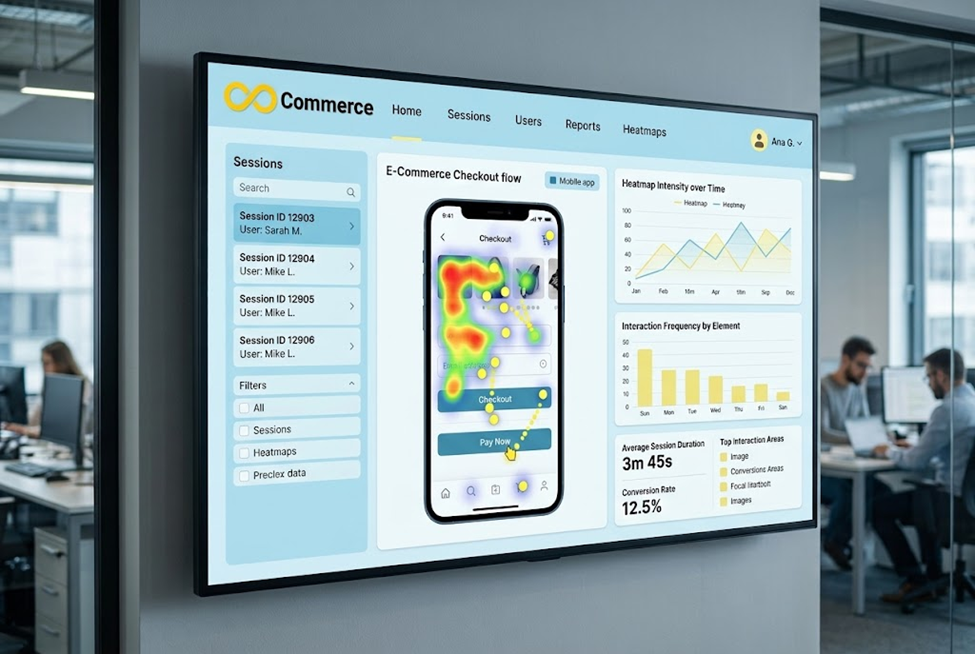
Numbers show where. Recordings and heatmaps often show why.
Microsoft Clarity is a behavioral analytics tool. Per Microsoft’s documentation, it is a free service with no obligation to upgrade, and it offers session recordings, heatmaps (click, scroll, area and conversion maps), funnels, filters and segments. It also documents masking, IP exclusion, data retention, cookie management and consent tools.
For checkout work, these are the things to look for:
- Rage clicks and dead clicks: shoppers clicking on a button or text that does nothing, which can signal a broken element or a misleading design.
- Repeated form edits: a shopper retyping an address or coupon code several times suggests an error message that is unclear.
- Scroll behavior: on a long mobile page, do shoppers ever reach the pay button?
- Device differences: a problem that appears only on one phone model or browser.
One practical caution. Shopify’s checkout is hosted and has its own restrictions on what scripts can run there, so the amount of detail you can capture on checkout pages may be limited compared with your theme pages. Check what is recorded on your own store before you build a plan around it. Even if checkout screens are limited, recordings and heatmaps of your cart and product pages still show how shoppers behave right before they begin checkout.
If you want a one-click route, Infinite Commerce’s Microsoft Clarity and Heatmap app adds Clarity to a Shopify store without code. Its page says it tracks events including View Category, View Items, Add to Cart, Begin Checkout, Purchase and Search. The Standard plan is listed at $9.99 a month with 1,000 sessions, recordings and heatmaps, and Premium at $19.99 a month with unlimited sessions, recordings and heatmaps, each with a 7-day trial (prices as listed on the app’s page; check them again before you install). The page also says that recordings and heatmaps stay in your Clarity account if you uninstall the app.
If you use any recording tool, handle consent properly. Clarity says it should not be used on websites or apps that target users under 18, and you should set up masking and consent according to the laws that apply to your customers.
Step 3: Reduce effort
Every field, click and decision is a small tax on the shopper. The aim is to ask for only what you need to fulfil the order and to make the rest automatic.
Review your checkout form
Open your checkout in a private browser window as a first-time customer and complete it on your phone. Count the fields and decisions. Then ask of each: do we need this to ship and charge? Shopify’s checkout settings include form options, address collection preferences, email collection and tipping. Review each one against what your business actually needs. For example, if you never use a company name or a second phone number, consider whether you need to ask for them. Optional fields that are shown by default can still read as extra work.
Shopify’s documentation lists these settings as topics but does not detail every individual option, so open your own settings page to see exactly what you can change on your plan.
Make guest checkout easy
Forcing an account creation before payment is a classic source of drop-off. Check your customer account settings and make sure a shopper can buy without building a password. Offer an account after the order is placed, where it feels like a benefit and not an obstacle.
Turn on accelerated checkout
Shop Pay is Shopify’s accelerated checkout. According to its help page, it saves a shopper’s email, payment method and shipping and billing details so they do not have to re-enter them on later purchases, and it is included with Shopify Payments. Shopify states that faster checkout can lead to higher conversion rates, though the help page provides no performance data, so treat that as a vendor claim and measure the result on your own store.
Other wallets and express buttons can serve the same purpose where they are available on your plan and in your region. Place them where shoppers will see them early, ideally on the cart and at the top of checkout, not hidden at the bottom.
Step 4: Show the full cost early
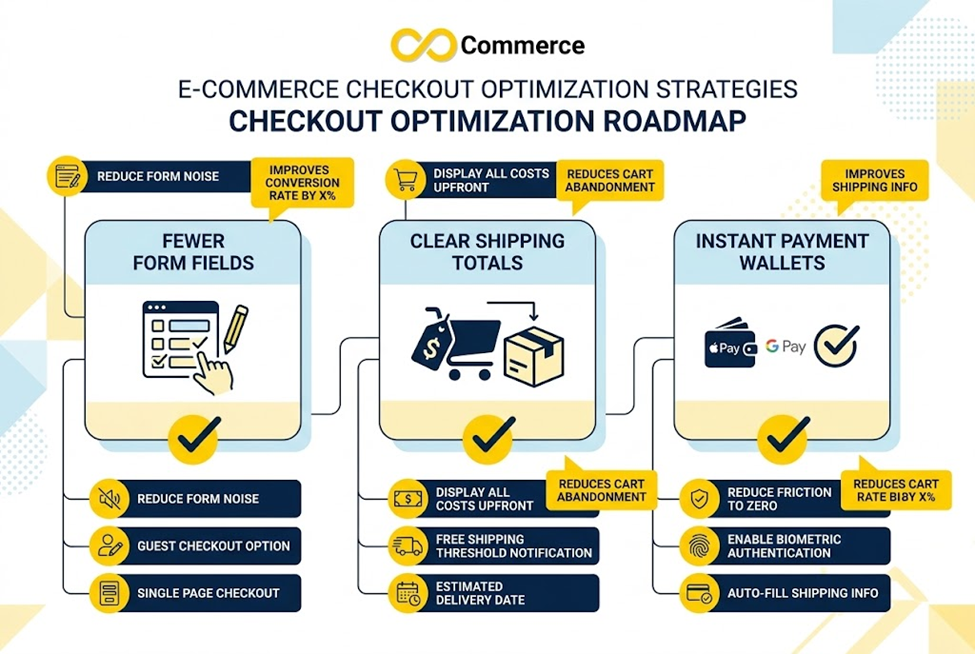
Unexpected costs are one of the most commonly cited reasons for abandoning an order. Because that claim appears in many surveys of varying quality, this article does not quote a percentage. The principle is simple enough to act on without one: no shopper should learn the real total for the first time on the last step.
Shipping
Shopify’s shipping rate options include flat rates, free shipping and carrier-calculated rates. The page also notes that transit time can display delivery estimates at checkout, and that backup rates help customers complete checkout when carrier-calculated rates fail. A few practical points:
- State shipping costs and thresholds on product and cart pages, not only at checkout.
- If you offer free shipping above a minimum order value, show how close the cart is to it.
- Show delivery estimates where you can. Uncertainty about when something will arrive is its own kind of friction.
- Set backup rates so a carrier outage does not leave shoppers with no way to buy.
Taxes and duties
Shopify’s tax settings let you show prices with or without tax depending on where customers shop, and let you charge customs fees upfront at checkout instead of on delivery. If you sell internationally, a shopper who is surprised by a duty bill after delivery is likely to leave a bad review or refuse the parcel. Showing these amounts upfront avoids that.
Step 5: Offer the right payment methods
A shopper who cannot pay the way they prefer will often leave. Shopify’s payment methods documentation describes several routes:
- Cards: Shopify Payments is set up to accept all major payment methods when you create your store.
- Wallets: Shop Pay and Shop Pay Installments are named as Shopify Payments options, and PayPal is also mentioned.
- Local methods: you can offer region-specific methods such as iDEAL, Klarna and Bancontact manually.
- Manual methods: cash, cash on delivery and bank transfers are listed.
- Third-party providers: you can use a direct provider, or run one alongside Shopify Payments, though transaction fees apply when you use both.
Which of these matter depends on where your customers are. Look at your analytics by country and your customer support messages. If shoppers in one country keep asking whether you accept a particular method, that is your answer.
Also check the failures. Look for payments that are declined or fail with an error, and test every method you offer with a real or test order. A payment button that looks fine but fails for one card type can sit unnoticed for weeks.
Step 6: Make checkout fast and reliable on mobile
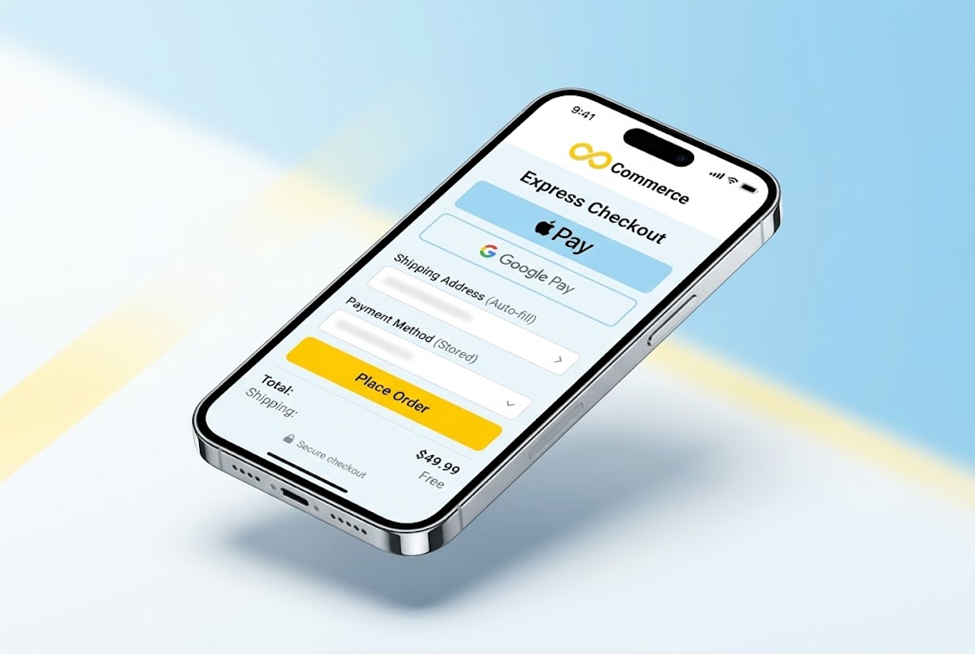
Many shoppers will complete their purchase on a phone, so test your checkout there before anything else. Look at the cart page and the transition into checkout in particular. Slow or shifting pages make shoppers hesitate at the worst moment.
Google’s Core Web Vitals give you concrete targets to measure your theme pages against: Largest Contentful Paint within 2.5 seconds, Interaction to Next Paint of 200 milliseconds or less, and Cumulative Layout Shift of 0.1 or less, measured at the 75th percentile of page loads. These apply to the pages you control, such as your cart, more than to Shopify’s hosted checkout. To keep them healthy:
- Remove unused apps and scripts, and compress images on cart and product pages.
- Avoid pop-ups that cover the pay button on small screens.
Step 7: Build trust at the point of payment
Paying a store for the first time feels risky, and checkout is where that risk peaks. Show familiar payment options, keep shipping and returns wording plain and consistent with your product pages, and make contact details easy to find. Shopify lets you apply your logo, colors and fonts through the checkout editor, so checkout feels like part of the same store. Fix obvious errors such as broken images or mismatched prices first, because they undermine trust faster than any badge can build it. Trust badges are a common suggestion, but nothing guarantees they lift conversion on your store, so test them like any other change.
Step 8: Recover shoppers who leave anyway
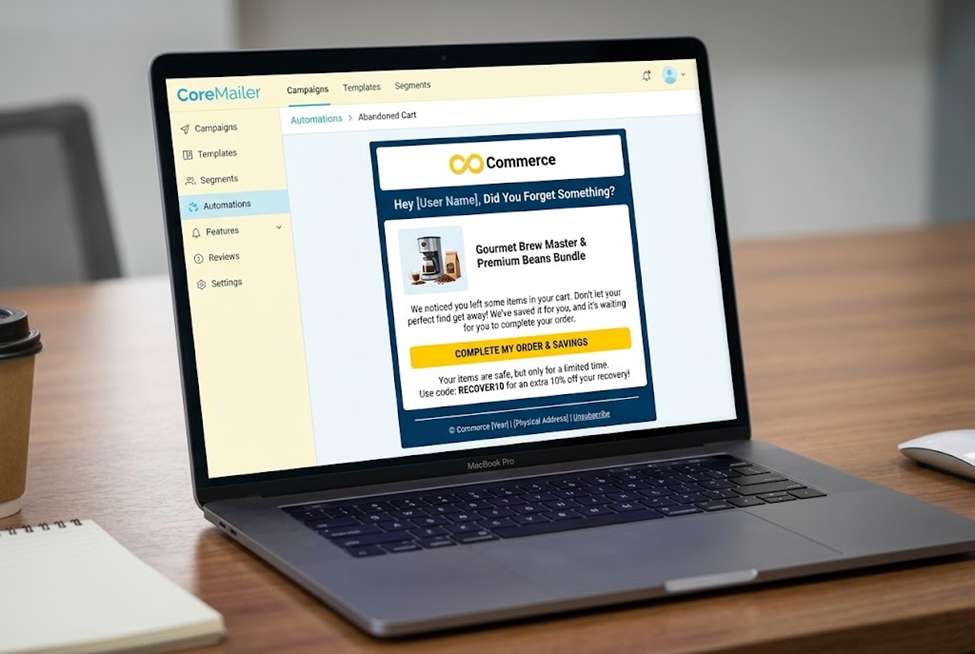
No checkout converts everyone. Recovery emails give you a second chance with shoppers who have already given you an email address.
Per Shopify’s documentation, you can automatically email customers a link to resume their checkout. In the admin, you go to Apps, then Messaging, then Automations, and edit the abandoned checkout automation, where you can turn on sending, choose who to send to, set the delay before the email goes out, and customize the template. The page describes the legacy abandoned checkout experience, so your admin may look slightly different.
Shopify also lists the cases where no recovery email is sent, including when the customer completes a purchase before the email goes out, when a payment processing error occurred, when you do not ship to the customer’s address, when the customer entered a phone number instead of an email, and when Shopify Payments blocked the payment as high risk. That list is a useful diagnostic. If a lot of your abandoned checkouts fall into those cases, the fix is in your checkout, not your email.
A good recovery email:
- Reminds the shopper what is in their cart, with an image.
- Makes the way back one click.
- Answers the likely objection, such as shipping time, returns or payment options.
- Does not apply pressure with false urgency or invented deadlines.
Decide on a discount carefully. Offering one to every abandoner can teach shoppers to leave on purpose. Use it sparingly and measure it.
Step 9: Track every change
Checkout optimization is a series of small experiments. Without tracking, you will not know which one helped.
Log and isolate changes
Write down the date, the change and the metric you expect to move. Change one thing at a time, and give each change enough orders to mean something.
Make sure the data is clean
Conversion data feeds both your reports and your ad platforms, so errors spread. Before you trust any before-and-after comparison, verify that:
- The purchase event fires once per order, with the correct value.
- Begin checkout and the other funnel events fire at the right step.
- Consent settings are not accidentally blocking events.
- Your ad platforms receive the same events your analytics does.
Infinite Commerce’s Google Ads Tracking and GTM app can help on the ad side; its page lists Standard at $9.99 a month covering page views, add to cart, begin checkout and purchase events. If your ads are part of your traffic mix, check this before concluding that a checkout change hurt or helped.
Final thoughts
Good checkout optimization is mostly patient diagnosis. Measure the funnel, find the largest leak, watch what shoppers actually do, and fix the cause rather than the symptom. Reduce effort, show every cost early, offer the payment methods your customers use, keep the pages fast, and recover the shoppers who leave anyway. Then measure every change before you make the next one.
FAQs
See where shoppers drop off, then measure the fix
You cannot fix what you cannot see. Infinite Commerce’s Microsoft Clarity and Heatmap app adds heatmaps and session recordings to your Shopify store, with a 7-day trial on each plan. If you want help setting up checkout tracking or reading your funnel, contact our team.
It is the process of finding and removing the friction that causes shoppers to leave between starting checkout and completing an order. It covers form design, costs, payment options, speed, trust and recovery, and it relies on measuring each change.
Start by finding which step loses the most shoppers, using a funnel report and session recordings. Then address the cause: shorten the form, show shipping and taxes early, offer the payment methods your customers expect, enable Shop Pay, and turn on abandoned checkout emails.
Per Shopify, a checkout is abandoned when it remains incomplete for more than ten minutes after the customer has provided their email address and has not paid.
Shopify says accelerated checkout can lead to higher conversion rates, but its help page does not give data. It is included with Shopify Payments, so test it and compare your own conversion before and after.
